How to Reset Ring Security Camera Quickly and Easily

Ring security cameras have become a cornerstone of leading private security services for both residential and commercial properties. Sometimes, these cameras require a fresh start to resolve connection issues or performance problems. This guide walks you through the reset process step by step. You’ll learn what tools you need, where to find the reset button, and how to get your camera back online. The entire process takes just a few minutes when you follow these simple instructions.


Gather Necessary Tools

Before you start, grab a few items to make the reset smooth. You’ll need a small pin or paperclip to press the reset button on the camera. Ensure your internet connection is stable and functioning properly. Keep your phone, tablet, or computer nearby since you’ll need the Ring app open. Having everything ready before you begin saves time and prevents frustration. Once you have these tools, you’re set to move forward.


Locate Reset Button

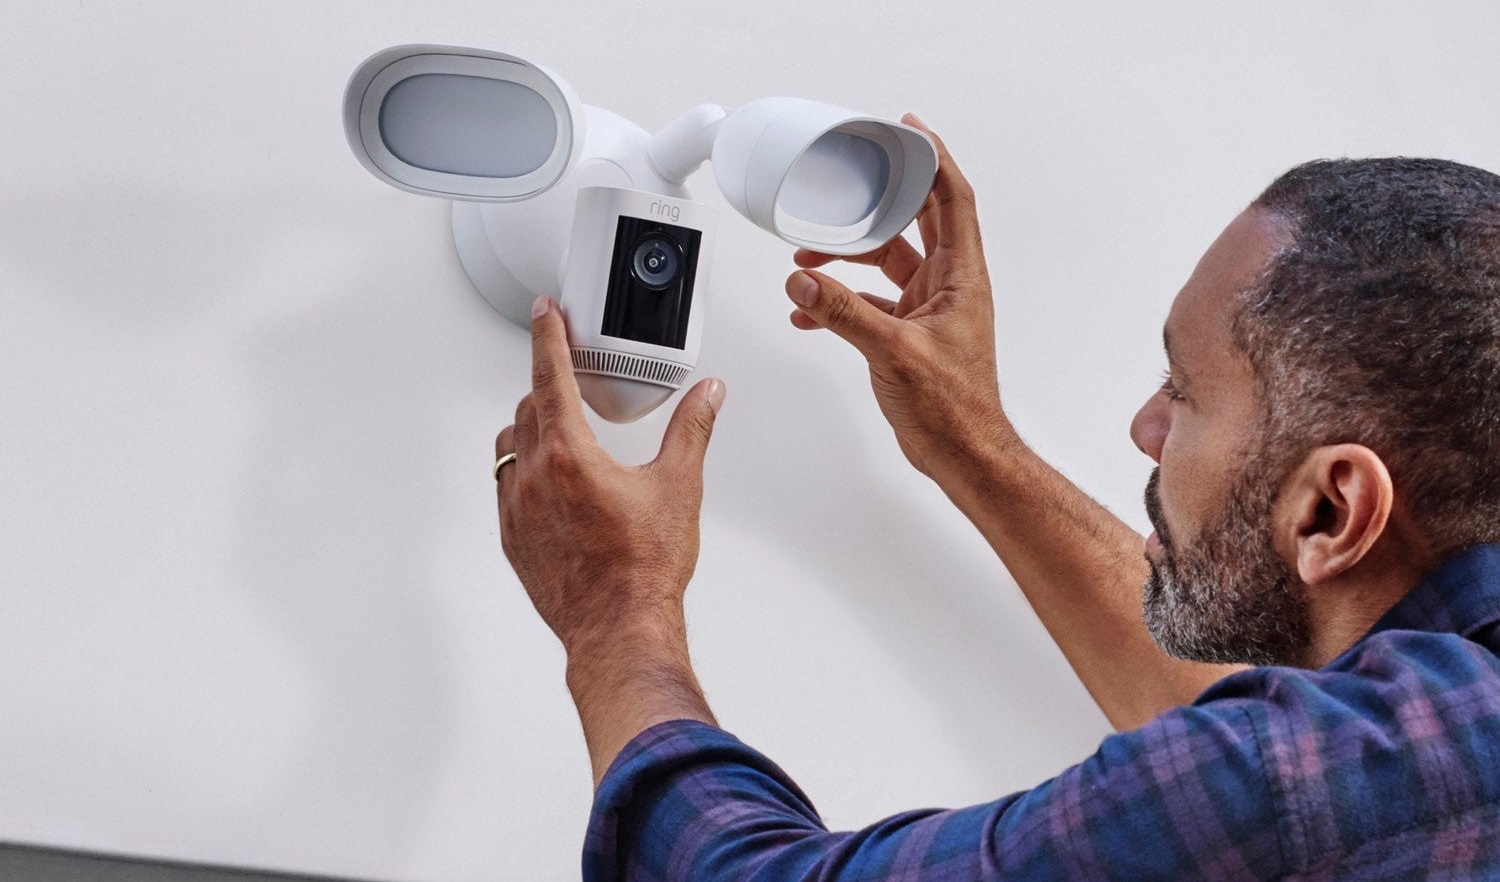
The reset button sits on the back or bottom of your Ring camera. It’s a small, recessed button that requires a thin object, such as a paper clip, to reach it. Look around the area near the camera lens or where the power cord plugs in. Some Ring models hide the reset button behind a small opening to stop accidental resets. Take a moment to find it before you start the reset. Knowing where it is beforehand makes the whole process faster and easier.


Press and Hold Button

Press the reset button firmly and hold it for about 15 seconds. This restores your camera to its factory settings and clears out any glitches. Here are three tips to get it right:

  1. Firm Pressure: Press the button all the way down to trigger the reset properly.
  2. Count Time Accurately: Count slowly to 15 seconds to ensure the reset is complete.
  3. Wait Patiently: After holding the button, let the camera restart fully before touching it again.

The button needs steady pressure for the full 15 seconds. Don’t let go early, or you might have to start over.


Wait for the Light Indicator

Watch the light on your camera after you finish the reset. You should see a spinning white circle first, which means the camera is restarting. After the white circle stops spinning, the light turns solid blue. The blue light indicates that the camera is in setup mode, and the reset was successful. If you don’t see the solid blue light after the spinning stops, try the reset again. The light indicator is your assurance that everything went right. Don’t skip this step, or you might think something’s wrong when it’s actually fine.


Reconnect Camera to Network

Now, you need to reconnect your camera to Wi-Fi. Ensure your internet signal reaches the location where the camera is situated. Follow these steps:

  1. Power Cycle: Turn off the camera, unplug it, wait 10 seconds, then plug it back in.
  2. Reset Network Settings: Hold the setup button on the camera for 20 seconds until the light flashes.
  3. Reconnect to Wi-Fi: Open the Ring app, tap your camera, and follow the on-screen prompts to rejoin your Wi-Fi network.

Your camera should connect within one to two minutes. If it doesn’t, check that you entered the correct Wi-Fi password.


Complete Setup Process

The final step restores your camera to full operational status. Make sure the camera has power and shows it’s connected to Wi-Fi. Open the Ring app on your phone and tap ‘Setup Device’ at the bottom. Pick ‘Security Cameras’ from the list, then select your camera model. Enter your Wi-Fi password when prompted by the app. Set up your preferences, such as motion detection zones and notification settings. Test everything by checking the live video feed in the app. Your camera is now reset and ready to protect your space again.


Related Topics:

How to Mount Security Camera Without Drilling: Simple DIY Solutions

Protecting your property doesn’t always require permanent installations or complex tools. Many homeowners and renters want to install cameras without damaging walls or surfaces. Just like trusted private security guards adapt to different situations, your camera mounting solutions should be flexible too. This guide covers several no-drill methods that work for various locations and camera types. You’ll learn about adhesive strips, magnetic mounts, clamps, suction cups, and tripod stands.


Adhesive Mounting Strips

Adhesive mounting strips give you a damage-free way to secure your camera in place. Start by cleaning the mounting surface thoroughly and letting it dry completely. Peel off the backing from one side of the strip and press it firmly onto your camera. Remove the backing from the other side and position the camera where you want it to be. Apply steady pressure for a few seconds to create a strong bond. These strips are most effective on smooth surfaces, such as walls or ceilings. Check the weight capacity listed on the package to ensure it can safely hold your camera.


Magnetic Mounts

Magnetic mounts attach easily to metal surfaces without the need for tools or drilling holes. These mounts use strong magnets that stick securely to metal doors, window frames, or filing cabinets. Clean and dry the surface first to get the strongest magnetic grip. Position your camera where you need it and let the magnets snap into place. You can adjust the angle and direction at any time to achieve better coverage. The best part? You can move and reposition the camera at any time without leaving marks. This makes magnetic mounts perfect for temporary setups or rental properties.


Clamp or Clip Mounts

Clamp mounts grip onto surfaces, such as shelves, window sills, or door frames, without requiring drilling. These mounts feature adjustable arms or brackets that accommodate a wide range of camera sizes and shapes. Look for clamps made from metal or heavy-duty plastic for better stability. Ensure the clamp has a strong grip to prevent your camera from accidentally falling off. Clean the surface before attaching the clamp to help it hold better. Clamp mounts provide the flexibility to install cameras in various locations around your property. They’re easy to move if you need to change your camera’s location later.


Suction Cup Mounts

Suction cup mounts work great on glass and other smooth, non-porous surfaces. These mounts create a vacuum seal that holds your camera securely in place. Clean and dry the surface thoroughly before installation to achieve maximum suction. Press the suction cup firmly against the surface, then engage the locking mechanism to create the seal. Adjust your camera to the right angle and tighten the mount. Suction cup mounts are suitable for temporary installations or areas where drilling is not possible. Check the suction regularly to ensure it remains strong and effective.


Tripod or Stand Mounts

Tripod mounts offer a stable and flexible way to position your security camera. Here’s what makes them useful:

  1. Adjustable Height: Most tripods feature adjustable legs that allow you to set the camera at the ideal height for optimal surveillance coverage.
  2. 360-Degree Rotation: Many tripod mounts allow you to pan and tilt the camera to efficiently monitor different angles.
  3. Sturdiness: Opt for tripods with a solid construction to ensure your camera remains steady without wobbling or tipping over.

Tripods are easy to move around, making them perfect for monitoring different areas at different times.


Command Hooks or Strips

Command Hooks and Strips offer a simple, non-invasive installation option. Command Hooks have adhesive backing that securely holds lightweight cameras. Clean and dry the mounting surface before applying. Follow the weight limits and instructions on the package. For heavier cameras, use Command Strips instead. These strips provide a stronger hold and remove cleanly without damaging surfaces. Pick the right size and weight capacity for your camera. Press firmly for a few seconds when attaching the camera to the strip. Always refer to the manufacturer’s instructions for optimal results with Command products.


Related Topics:

Best Fixes for Security Camera Lag or Delayed Motion Alerts

Security camera lag and delayed motion alerts can compromise your property’s protection. These issues frustrate homeowners and even local private security guards who rely on instant notifications. This guide offers practical solutions to resolve these issues and get your cameras up and running smoothly again. You’ll learn about network optimization, firmware updates, camera placement, motion detection tweaks, and bandwidth improvements. Apply these fixes to restore your system’s reliability and speed.


Check Network Connection

Your security camera needs a stable network to send footage without delays. A wired Ethernet connection typically performs better than Wi-Fi, as it offers more consistent speed and bandwidth. If you must use Wi-Fi, keep your cameras close to your router or consider using a Wi-Fi extender to boost the signal. Try to limit other devices on your network when cameras are actively recording. This reduces competition for bandwidth and helps prevent lag. A strong network connection typically resolves most delay issues immediately.


Update Camera Firmware

Camera firmware updates fix bugs, patch security holes, and enhance the performance of your system. Locate your camera’s model number and visit the manufacturer’s website to download the latest firmware version. Save the file to your computer and follow the installation steps provided by the maker. Check for updates regularly, at least once every few months , to ensure your cameras continue to function properly. Outdated firmware can create vulnerabilities that slow down your cameras and delay motion alerts.


Adjust Camera Placement

Where you place your cameras affects how well they perform. Position them to cover your target area without objects blocking the view. Avoid aiming cameras directly at bright lights or the sun, as this creates glare and washes out the image. Mount cameras high enough for a clear view but out of reach from people who might tamper with them. Angle the camera to capture the most useful footage of entrances, walkways, or problem spots. Smart placement reduces false alerts and improves detection speed.


Optimize Motion Detection Settings

Fine-tuning your motion detection settings reduces false alerts and increases the speed of real notifications. Here’s how to dial in your settings:

  1. Sensitivity: Lower the sensitivity to ignore small movements, such as leaves or shadows, that don’t affect security.
  2. Detection Zones: Set up zones that focus on important areas, such as doors and driveways, while ignoring busy streets or neighbors’ yards.
  3. Notifications: Select which events trigger alerts, so you only receive notifications about real threats, not every minor movement.

Proper settings mean your camera spends less time processing irrelevant motion and more time catching what actually matters.


Increase Internet Bandwidth

Faster internet speeds mean quicker data transfer between your camera and phone or computer. Higher bandwidth delivers real-time video feeds and instant motion alerts without buffering. Consider upgrading your internet plan to get faster speeds if you’re experiencing constant lag. Switch to a more reliable internet provider if your current service can’t handle multiple cameras. Use wired connections for cameras when possible instead of relying solely on Wi-Fi. Run speed tests periodically to check if your internet can support the needs of your camera system.


Reset Camera Settings

Sometimes, a simple reset can resolve stubborn performance issues and restore your camera to normal operation. Here’s how to reset your camera:

  1. Access Camera Settings: Open your camera app or web interface and find the settings menu.
  2. Select Reset Options: Look for ‘Factory Reset’ or ‘Restore Default Settings’ in the menu.
  3. Confirm Reset: Follow the prompts to complete the reset and let your camera restart.

After resetting, you’ll need to reconfigure your settings, but this often resolves lingering lag issues that other fixes couldn’t resolve.


Related Topics:

How to Install Outdoor Security Cameras on Brick or Siding Safely and Securely

Installing outdoor security cameras might seem tricky at first, but it’s manageable with the right approach. This guide walks you through mounting cameras on brick or siding, from picking the perfect spot to testing your setup. You’ll learn what tools you need, how to prepare surfaces, and cable management tips. Downey’s skilled private security guards often recommend these installation techniques for homeowners who want reliable surveillance. Follow these steps to protect your property with a professional-looking camera system.


Choosing the Right Location

Select your camera spot carefully, considering what you need to capture. Place it where you get a clear view of the area you want to monitor. Avoid putting cameras behind trees or bushes that block the lens. Good lighting matters your camera needs enough light during day and night to capture clear footage. Look for spots where someone could hide from the camera’s view and adjust the angle to cover those areas. Smart placement means better security coverage for your property.


Necessary Tools and Materials

You’ll need some basic tools to mount your cameras correctly. Here’s what to grab:

  • Drill with Masonry Bit: For making holes in brick or siding.
  • Screwdriver: To securely attach the camera mount.
  • Level: Keeps your camera straight and aligned.
  • Anchors and Screws: For securing the mount to the surface.
  • Weatherproof Sealant: Seals around the mount and stops water damage.

Having these tools ready before you start makes the job go smoothly.


Preparing the Mounting Surface

Prepare your surface before drilling. Select your spot based on what the camera needs to see and where you can easily run wires. Check the area for any obstructions that might interfere with mounting. Clean off dirt, dust, or debris that could mess with the installation. For brick, use a masonry drill bit to make holes for the anchors. For siding, locate the studs behind it so you have a solid surface to mount on. Ensure the surface is level and clear before proceeding.


Mounting the Security Camera

Mounting your camera correctly keeps it stable and allows you to film what you need. Here’s how to do it:

  • Select the Right Spot: Choose a location that provides a clear view of what you want to watch.
  • Use the Right Tools: Keep your drill, screws, anchors, and level readily available for a clean installation.
  • Adjust Camera Position: Tilt and rotate the camera until you achieve the desired angle.
  • Check Stability: Ensure the camera is securely locked in place to prevent shaking or movement.
  • Test Camera Angles: Before finishing up, check that the camera actually captures what you need to see.

A solid mount means reliable footage when you need it.


Wiring and Cable Management

Use cable clips or conduits to keep your wires organized and protected. Good cable management makes your install look professional and protects the wires from damage. Plan your cable routes first to avoid problems or interference. Attach waterproof cable clips along the mounting surface to shield wires from rain and wind. For a cleaner look, run wires through cable conduits to hide them completely. Leave some extra wire near the camera so you can adjust things during setup. Label each cable so you can identify it later. These steps keep your wiring looking good and working right for years.


Testing and Adjusting the Camera

After everything’s mounted, test your camera to ensure it works properly. Here’s what to check:

  • Check Camera Angles: Ensure the camera is positioned to capture what you want to see.
  • Test Night Vision: Verify that the camera captures clear images in low-light conditions.
  • Adjust Motion Detection: Set the motion sensors to avoid false alarms.
  • Test Remote Access: Make sure you can view the camera feed on your phone or computer.
  • Review Recording Quality: Watch some footage to confirm it’s clear and sharp.

Running these tests now saves you headaches later. Take time to fine-tune everything until you’re happy with how it works.


Related Topics:

Best Placement for Indoor vs. Outdoor Security Cameras

The best placement for indoor vs. outdoor security cameras depends on how each area contributes to the overall safety of a property. Indoor security cameras capture what happens inside at entryways, hallways, and near valuable items, while outdoor security cameras monitor entry points, driveways, and perimeter zones. Proper positioning helps ensure clear footage, prevent tampering, and strengthen your home or business security system, which is why private security guards in Downey often recommend a strategic mix of both indoor and outdoor camera coverage for comprehensive protection.


Indoor Security Camera Placement

Effective indoor camera placement begins with identifying areas where activity is most likely to occur. Position cameras near front and back doors, hallways, and rooms that contain valuables such as safes, electronics, or important documents. Mount cameras at eye level to capture facial details and keep them angled away from windows or direct light sources to prevent glare.

For better results, place cameras in corners to expand the field of view and reduce blind spots. Adjust each camera’s tilt and focus to ensure no obstructions, such as furniture or décor, block the image. Customer feedback often highlights that well-placed indoor cameras provide peace of mind by recording key areas without affecting privacy.


Outdoor Security Camera Placement

Outdoor camera positioning plays a major role in deterring intruders and recording activity around your property. Install cameras at main entry points, doors, gates, garages, and driveways where motion is most common. Position each camera approximately 9 to 10 feet above the ground to strike a balance between visibility and tamper resistance.

Angle cameras slightly downward for better recognition of faces and vehicles, and avoid pointing them directly at bright lights or reflective surfaces. Many users note that cameras covering side alleys and backyards significantly reduce blind spots and strengthen perimeter protection.


Factors to Consider for Indoor Cameras

Before installing, review the layout and purpose of each indoor space to ensure a seamless integration. Identify entrances, exits, and areas that need regular monitoring. For example, a camera in the living room may cover both entryways and high-traffic zones.

When evaluating placement, ensure cameras are out of easy reach to prevent interference. Use models with adjustable lenses or wide-angle coverage to improve clarity across larger rooms. Feedback from homeowners often emphasizes that fine-tuning angles and lighting leads to more reliable recordings and easier evidence retrieval if needed.


Factors to Consider for Outdoor Cameras

Outdoor setups must account for environmental factors, including weather, light, and movement. Select cameras that are weather-resistant and capable of operating in a wide range of temperatures. Consider features like infrared or night vision for low-light conditions and high-resolution lenses for sharper images.

Evaluate each camera’s field of view to make sure entryways, side paths, and secluded corners are covered. Periodically check the camera’s connection and mounting stability to ensure continuous monitoring. Many professional installers recommend routine adjustments as lighting and landscaping change over time.


Ideal Locations for Indoor Cameras

Key indoor locations include:

  • Main entrances are to be monitored to track who comes and goes.
  • Common areas, such as living rooms, hallways, and kitchens, are where activity frequently occurs.
  • Rooms with valuables, where an additional camera angle provides focused coverage.

Keep each camera at eye level for recognizable footage and away from direct sunlight or lamps. Customers often report the best results when cameras blend naturally into the décor while still maintaining strong visibility.


Ideal Locations for Outdoor Cameras

Essential outdoor spots include:

  • Front doors to record deliveries and visitor activity.
  • Backyards and side entrances to cover less-visible areas.
  • Garage doors and driveways for vehicle monitoring.
  • Property corners to capture a wide field of view and eliminate blind spots.

Install cameras at about 9 feet high and angle them to minimize glare. Regularly review recorded footage to confirm the positioning remains effective as lighting conditions change throughout the year.

Placing indoor and outdoor security cameras strategically ensures full property coverage, clear visuals, and reliable surveillance. Combining thoughtful positioning with durable equipment and ongoing feedback from real-world users helps create a security setup that performs consistently and earns long-term trust.


Contact Us

We’re here to provide the security solutions you need. Whether you’re seeking a quote, have questions, or need assistance, reaching out is easy.

📧 Email us at info@allcode4.com for general questions or to request more information.

📞 Call Us: Speak directly with our team at (888) 601-5311.

📍 Visit Us: 10907 Downey Ave UNIT 202, Downey, CA 90241

💬 Live Chat: For quick questions, use our live chat feature on the bottom right of the page.

🌐 Request a free consultation or quote by visiting our Quote for Services page.

We look forward to assisting you with your security needs!


Related Topics:

Understanding the Role of Security Guards in Conflict Resolution

Security guards play a central role in managing conflict through their training in communication, threat recognition, and response planning. Their responsibilities often go beyond presence alone, they are expected to evaluate tensions, intervene calmly, and uphold safety without escalation. Reliable private security services prioritize equipping guards with the practical tools to identify risks early, manage emotions, and coordinate with law enforcement when needed. This post outlines how security professionals use real-world training to assess threats, de-escalate difficult situations, apply legal guidelines, and implement proactive safety protocols.


Security Guards’ Conflict Resolution Training

Training programs for security guards focus heavily on preparing them to manage disputes in a calm and controlled manner. These programs are designed to improve decision-making under pressure while emphasizing public safety. Through scenario-based instruction and role-play, guards learn how to respond without aggression, communicate with clarity, and address underlying tensions. They study behavioral patterns and learn to interpret physical and verbal cues that often signal rising conflict. In high-stress environments, this training allows guards to act swiftly and responsibly, minimizing disruption while ensuring individuals on-site feel protected and respected.


Communication Techniques in Conflict Management

The ability to manage conflict depends largely on how effectively a guard can communicate. Staying composed and using respectful, clear language helps de-escalate potential confrontations. Security personnel are trained to listen closely without interrupting, respond in a measured tone, and establish trust through consistent body language. In challenging moments, calmly stating intentions and reinforcing safety protocols can shift a situation from reactive to cooperative. Even under pressure, guards are taught to avoid aggressive posture or language. The goal is to maintain order through presence and professionalism rather than force.


Assessing Risk and De-escalation Strategies

Risk assessment allows security guards to identify signs of possible disruption before it escalates. Understanding the environment, monitoring individual behavior, and recognizing emotional triggers help in forming the right response. Guards are trained to keep situations from escalating by applying strategies like non-threatening gestures, measured speech, and controlled physical positioning. These techniques are part of an approach that centers on preventing harm, not just reacting to it. Being able to think critically while staying calm is essential for protecting people and property without creating further tension.


Legal Considerations in Conflict Resolution

Security professionals must work within legal boundaries at all times, particularly during conflict resolution. Guards are expected to know the laws that apply to their role, including those related to detainment, use of force, and trespass handling. Staying informed on these regulations helps ensure actions taken during an incident are lawful and proportionate. In addition, accurate documentation of events is vital in case follow-up is required. Proper reporting protects both the security provider and the client from liability. Legal awareness supports better decisions and reinforces trust in the guard’s judgment during high-stakes situations.


Collaborating With Law Enforcement Agencies

While security guards serve as the first line of response, there are situations where cooperation with police or emergency responders becomes necessary. Guards are trained to pass on vital details, assist in securing a scene, and follow directions from law enforcement officers. This coordination relies on clarity, prompt communication, and an understanding of where private security ends and public authority begins. Guards familiar with legal jurisdictions and response protocols are more effective in joint operations. A well-managed partnership between private security and public law enforcement often leads to safer outcomes for everyone involved.


Implementing Preventive Security Measures

Beyond resolving active conflicts, guards play a role in preventing them from occurring. Regular walkthroughs, reviewing security procedures, and keeping detailed records are daily practices that help reduce risk. Access control, guest monitoring, and surveillance tools contribute to deterrence by making it clear that a location is monitored and managed. Consistent enforcement of site rules helps create an atmosphere of order. Security guards participate in ongoing training not only for their own development but also to share safety knowledge with clients and team members. A strong focus on prevention helps limit the chances of serious incidents and contributes to long-term security and stability.


Related Topics:

Everything You Need to Know About Concierge Security

To fully understand concierge security, one should note that it delivers personal and high-quality protection tailored to your circumstances. When you partner with a licensed security guard company, you gain professional care in access control, monitoring, and rapid response. Concierge security means planning based on risk assessments, setting up needed protocols, and maintaining prevention and deterrence. Many businesses in hospitality, healthcare, and luxury housing rely on this model for added oversight and guest assurance. Before engaging such services, review the security requirements, examine response capabilities, and check credentials. Choosing wisely ensures that you receive protection matching your concerns and environment.


What is Concierge Security?

Concierge security refers to a service that adapts to specific needs beyond standard protection. It involves deploying personnel who are trained to offer safety while preserving a friendly and helpful presence. Clients receive protection that complements their lifestyle and property design. Officers deliver attention to detail, handling security measures with both vigilance and tact. The goal is to guard against threats and support client comfort in equal measure. When delivered well, this kind of security contributes to confidence and peace among those protected.


How Concierge Security Works

Concierge security begins with assessing your premises: evaluating layout, traffic patterns, and potential risk points. Based on that, a custom plan is drawn, including surveillance, patrols, controlled access, and procedures for emergencies. Those engaged in this role study threat detection and respond when incidents arise. Communication channels are established so clients know how to report issues. Regular updates and adjustments ensure protection stays relevant. When executed properly, concierge security offers a balance of caution, service, and readiness.


Benefits of Concierge Security

Concierge security brings several advantages. You receive a team that remains attentive and acts when needed, helping deter incidents through visible presence. Security personnel foster a safe atmosphere where clients, visitors, or staff feel comfortable. Clear communication enhances trust with those entering or using the facility. Client satisfaction often increases when protection is paired with courtesy. Also, the risk of damage or theft tends to decrease when security is present in well‐managed ways. Overall, this service helps create spaces that are both safe and welcoming.


Industries Using Concierge Security

Various sectors employ concierge security to maintain safety and order. Hotels and resorts use it to protect guests and maintain service standards. Office buildings rely on such security to monitor access and manage visitor flow. Medical clinics and hospitals benefit when privacy, safety, and orderly operations are needed. Educational institutions use it for student and staff protection, especially during events or in high-traffic areas. Retail locations use concierge-style security to prevent loss and support customer experience. In each case, concierge security adapts to the specific environment and expectations of the people there.


Considerations Before Implementing Concierge Security

Before implementing concierge security, examine what your property requires. Evaluate entry points, visitor volume, possible risk scenarios, and the layout of spaces. Consider whether you need 24/7 coverage or certain hours only. Determine what level of access control you require, what technology will support monitoring, and how quickly security officers can respond. Budget is another factor, personnel training, equipment, and monitoring systems all carry costs. Also consider how security will integrate with building operations, guest services, or staff roles. Careful planning ensures the security measures you introduce serve rather than burden your space.


Choosing a Concierge Security Provider

When you select a provider, check for valid licenses and professional accreditations. Review past performance, ask for references, and see evidence of successful work in similar settings. Inspect training programs to ensure staff are prepared for emergencies, customer service demands, and ethical behavior. Ask about tools and technology used for surveillance, visitor tracking, and reporting. Communication is key: you need to know how the provider handles feedback, concerns, and changes over time. A provider who listens, updates, and adapts helps maintain consistent protection. Trust in your provider will show in their reliability and conduct.


Related Topics:

Key Preparation Tips for Your Drone Roof Survey

Preparing for a drone roof survey requires careful attention to several factors to ensure accuracy, safety, and efficiency. From evaluating weather conditions to checking your equipment and backing up data, each step plays a vital role in the process. Incorporating extra safety precautions can be particularly helpful when operating in high-traffic areas or commercial zones. In such cases, working alongside reliable hotel security services in San Jose can provide additional safety and coordination support. Managing battery levels, mapping out your flight route, and safeguarding your data are also essential to a smooth operation. Each of these elements contributes to consistent, high-quality survey results.


Weather Check

Always assess weather conditions before starting your drone survey. Wind can affect drone stability and image clarity, especially at speeds over 20 mph. Flying in rain or snow is risky, it can harm your equipment and obscure your visuals. While cloudy skies are typically manageable, intense sunlight may cause glare that impacts your footage. Temperature extremes should also be avoided. Drones function best between 32°F and 104°F. Outside this range, battery life and system reliability may suffer. A clear understanding of weather limitations helps avoid unnecessary risk and maintains data integrity throughout your inspection.


Equipment Inspection

Inspect your drone equipment thoroughly before heading into a survey. Examine the drone body for cracks or loose parts. Check that the propellers are intact and securely attached. Confirm the battery is charged, inserted properly, and shows no signs of damage. Test the controller’s response, ensuring stable signal strength and functional controls. Clean the camera lens, verify the gimbal movement, and ensure the GPS lock is strong. Review your microSD card to confirm you have enough storage space. Run a short test flight if necessary to confirm that takeoff, navigation, and landing systems are all operating smoothly. Taking time to verify these elements prevents issues during the actual survey.


Flight Planning

A detailed flight plan is the backbone of a well-executed roof survey. Start by outlining the specific area you’ll inspect and noting any nearby buildings, trees, or potential airspace restrictions. Use mapping tools to chart a flight path that covers the roof completely while avoiding obstructions. Set an appropriate altitude that offers clarity without sacrificing safety, keeping battery limitations in mind. Consider how the sun’s position might affect shadows or glare. Always brief any staff or on-site personnel to avoid disruptions during the survey. A well-structured plan allows for smoother flights and more reliable data.


Safety Precautions

Maintaining strict safety measures is a necessary step in any drone operation. Clear the survey area of people and vehicles to reduce hazards. Confirm the drone’s readiness with a final pre-flight check. Always fly within line-of-sight and stay within designated airspace. Keep a safe buffer from walls, trees, and power lines. Designate a controlled takeoff and landing zone that remains clear throughout the operation. Have a response plan ready in case of low battery alerts, lost signal, or technical issues. These steps reduce the chances of accidents and ensure the project stays on track.


Battery Management

Battery performance directly affects the length and success of your drone survey. Charge all batteries in advance and inspect them for swelling or wear. Monitor power levels throughout the flight, and don’t wait until they’re critically low to land. Structure your flight path to reduce unnecessary movement and preserve battery life. Environmental factors like high winds or extreme heat can drain batteries faster than expected, so factor these into your planning. Always carry spare batteries if available, and store them safely when not in use. A disciplined approach to battery use supports both efficiency and safety.


Data Backup

Backing up your survey data immediately after collection is essential for avoiding loss. Begin by transferring files from the drone to a secure device right after the flight. Use cloud-based platforms for off-site backup, and ensure your file naming system is consistent and organized. Verify that all footage is intact and accessible before deleting or reformatting memory cards. It’s also helpful to maintain copies on an external hard drive for redundancy. Consistent backup procedures protect your work and streamline access for editing, analysis, or client delivery later on.


Related Topics:

Understanding What a Drone Roof Survey Entails

When carrying out a drone roof survey, the first step is to clearly define the survey’s scope. It is important to carefully plan the flight path and perform a detailed pre-flight inspection. Maintaining a safe distance from obstacles throughout the flight ensures smooth operation. Specialized drones equipped with high-quality cameras, LiDAR sensors, and GPS technology provide precise data collection, which is vital for accurate analysis and decision-making. In contexts where safety and security are priorities, such as construction sites or commercial properties, the presence of certified private security guards can add an extra layer of protection during survey operations. Prioritizing safety measures, such as clearing the area, checking the drone’s condition, monitoring weather, and adhering to regulations, is necessary for successful and responsible surveying.


Advantages of Drone Roof Surveys

Drone roof surveys greatly improve the efficiency of inspecting and assessing rooftops for damage or maintenance needs. With high-resolution cameras, drones capture detailed images of the roof’s condition without the risks involved in manual inspections. This method speeds up the assessment process, saving valuable time and resources. Drones are capable of reaching difficult or hazardous areas like steep or unstable roofs, which are often unsafe for personnel. The extensive aerial footage captured offers a comprehensive view of the roof’s overall health. Additionally, this approach minimizes the chance of injury to workers, making it a safer alternative to traditional inspection methods.


Technology Used in Drone Surveys

Drone roof surveys rely on a blend of advanced equipment and software to gather detailed imagery and data effectively. High-resolution cameras and specialized sensors, including LiDAR (Light Detection and Ranging), play a significant role in producing accurate aerial footage of roofs. Thermal imaging cameras help detect temperature differences that can reveal problems such as water infiltration or insulation failures. GPS systems ensure precise navigation and mapping. The collected data is then processed using dedicated software, which creates 3D models, orthomosaics, and detailed reports to help identify defects and plan maintenance with confidence.


Process of Conducting a Survey

Conducting a drone roof survey requires thorough preparation and precise execution. Defining the survey’s scope helps identify the exact areas of the roof to be inspected. Planning the drone’s flight path ensures full coverage of the targeted sections. A comprehensive pre-flight check guarantees that the drone is fully operational before the survey begins. During the flight, maintaining a safe distance from obstacles and adhering to the predetermined flight path are essential. After data collection, analyzing the gathered information allows for an accurate assessment of the roof’s condition. Attention to detail and following the planned steps closely are crucial to a successful drone roof survey.


Importance of Accurate Data Collection

Collecting accurate data is fundamental for reliable and precise information during a roof survey. The data serves as the foundation for all subsequent analysis and decision-making. Ensuring precision in data collection means the insights derived are dependable and actionable. Measurements regarding roof dimensions, material conditions, and potential problems are critical for creating effective maintenance plans or deciding on repairs and replacements. Faulty data can result in incorrect evaluations, leading to unnecessary expenses or missed issues. Using advanced drone technology enhances both efficiency and accuracy, delivering detailed information essential for thorough evaluation. The quality of data directly impacts the survey’s success and outcome.


Safety Measures During Surveys

Ensuring safety during drone roof surveys is essential to protect both personnel and equipment. Before starting, confirm that the area is free of people to avoid accidents. Conducting a pre-flight check helps verify that all drone systems are functioning correctly. Maintaining a safe distance during takeoff and landing reduces the risk of injury. Monitoring weather conditions closely is necessary, and flights should be avoided during high winds or poor weather. Having a first aid kit on site prepares the team for unexpected situations. Lastly, complying with local regulations and securing necessary permits is vital for a safe and legal operation.


Applications of Drone Survey Data

Data from drone surveys allows for the accurate identification of structural concerns and supports efficient planning for maintenance or repairs. The information collected can be used to build detailed 3D models of the roof, detect water pooling or leaks, assess material conditions, and estimate the extent of damage. Analyzing these details enables professionals to prioritize repairs based on urgency, ensuring cost-effective maintenance. Furthermore, drone data supports monitoring the progress of maintenance work over time, helping to track improvements and extend the roof’s lifespan. Overall, the use of drone survey data significantly improves the accuracy and effectiveness of roof maintenance planning.


Related Topics:

What is the Purpose of Security Patrol: Understanding Its Role in Safety

Security patrol plays a key role in maintaining safety by discouraging criminal behavior, ensuring compliance with security policies, identifying vulnerabilities, and providing a visible deterrent against threats. This proactive effort helps reduce crime, improve surveillance, offer timely emergency responses, and foster positive community relationships. When combined with experienced retail security guard services, security patrols contribute meaningfully to the overall protection of people and property.


Importance of Security Patrol

Recognizing the value of security patrols is necessary to create a safe environment for both individuals and assets. Patrols serve as a frontline defense against criminal activity, quickly addressing emergencies and ensuring rules and protocols are followed. Frequent patrols allow security personnel to spot weak spots in security measures, prevent unauthorized entry, and maintain a visible presence that discourages suspicious behavior. These patrols also assist in monitoring safety standards, investigating unusual incidents, and offering help to those in need. The role security patrols play in protecting property and creating a sense of security for occupants and visitors is significant.


Crime Prevention Strategies

Effective crime prevention depends on a clear understanding of risks and vulnerabilities in any setting. Security patrols contribute by performing thorough risk assessments that pinpoint potential weak areas criminals might target. Measures such as adequate lighting, surveillance camera placement, securing entry points, and routine patrols work together to discourage wrongdoing and strengthen overall safety. A visible security presence often prevents crime simply by signaling vigilance. Cooperation between security teams, local law enforcement, and the community can further reinforce efforts by building awareness and shared responsibility. Constant evaluation and adaptation of these strategies allow security patrols to respond to emerging threats and protect the area more effectively.


Surveillance and Monitoring Duties

Patrol teams are responsible for actively watching and overseeing their assigned areas to detect threats or suspicious behavior early. This includes monitoring surveillance systems such as CCTV and conducting regular physical patrols to cover all grounds. Their presence ensures unauthorized individuals are spotted quickly and any security concerns are addressed without delay. Responding immediately to alarms or alerts is another crucial duty, allowing security personnel to manage incidents before they escalate. These combined activities maintain a secure environment and support the overall safety framework.


Emergency Response and Assistance

During emergencies, security patrols act quickly to manage the situation and reduce risk. Trained to assess incidents rapidly, they communicate with emergency responders and take necessary steps to protect people and property. This may involve securing affected areas, offering first aid, helping with evacuations, and coordinating with external agencies. Security patrols often implement established protocols, such as lockdowns or fire drills, to ensure orderly and safe responses. Their ability to act decisively during crises plays a vital role in minimizing harm and restoring normalcy.


Community Engagement and Communication

Building strong relationships with the community and maintaining clear communication are vital for effective security patrol operations. When patrol teams stay connected with residents and business owners, they gain insight into local concerns and security needs. This interaction encourages cooperation and helps tailor safety efforts to the community’s unique context. Patrol personnel often engage by attending neighborhood meetings, supporting community watch initiatives, and sharing safety updates through appropriate channels. Such involvement promotes trust and encourages everyone to contribute to a safer environment.


Enhancing Overall Safety Measures

Improving safety requires ongoing review and strengthening of existing security practices. This starts with a careful assessment of current procedures like access controls, surveillance coverage, and emergency plans to identify any weak points. Adding more patrols, improving lighting in dark areas, and expanding camera networks can help address gaps. Enhancing communication between security teams and those they protect also leads to better coordination and quicker response times. Regular updates and training ensure that security measures remain effective and adapt to changing needs. Proactive attention to safety helps reduce risks and supports a secure setting for all.


Related Topics:

Posts pagination